What I'm up to
  • Oxo Good Grips Small Wooden Spoon
    Oxo Good Grips Small Wooden Spoon
    OXO

    everyone needs these, many of them.

  • Mauviel Cuprinox Style 8-inch Round Frying Pan
    Mauviel Cuprinox Style 8-inch Round Frying Pan
    Mauviel

    Scarily, I can say I have enough copper. Not many people can utter those words.

  • Le Creuset Enameled Cast-Iron 5-1/2-Quart Round French Oven, Red
    Le Creuset Enameled Cast-Iron 5-1/2-Quart Round French Oven, Red
    Le Creuset

    The same thing could be said for Le Creuset, but still. Great for braising and soup making.

  • The Essential New York Times Cookbook: Classic Recipes for a New Century
    The Essential New York Times Cookbook: Classic Recipes for a New Century
    by Amanda Hesser
  • Nordic Ware Bakers Half Sheet, 13 X 18 X 1
    Nordic Ware Bakers Half Sheet, 13 X 18 X 1
    Nordic Ware

    What did I do before I started using this half sheet? Cry.

flora and flying. Get yours at bighugelabs.com

Entries in gluten free (24)

Tuesday
Dec142010

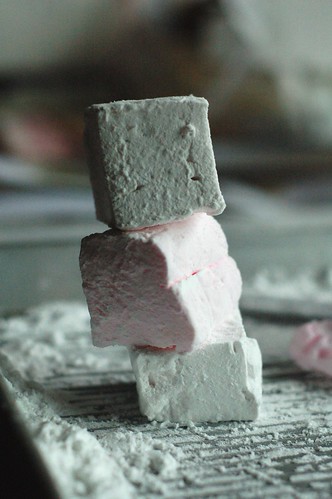
Homemade Marshmallows - easy peasy and fun to do 


towers of mallows

Wow, where has the month gone?

Mine has been spent in a frenzy of whipping eggs whites, conference calls, chasing tails, decorating pink hippos and keeping us all amused while house bound through band after band of storms drenching Seattle. The dog is not very happy and neither are my hostas.
 
There are now 10 days until Christmas and seven until Solstice.  I cannot wait until Solstice- the
days slowly get lighter and it feels like even for the gloomiest Gus, things are going to get better
from there on. Soon we can leave our offices in the evening dusk and by March, we're able to do all
our dog walks in the light. We won't feel so housebound. I long for that. In order to keep myself busy in the evenings, I have been making marshmallows and foisting them upon friends, colleagues and neighbors. 

They are so simple to make and taste nothing like the overly sweet  uniform cylinders you have leftover from your July attempt at making s'mores or the stuff you used to get in your bowl of lucky charms. These are a rustic concoction that take only about 25 minutes to make and can be flavored with many different extracts or liqueurs to appeal to any taste.

If you have kids you are trying to amuse during the holidays, this might keep them occupied for part
of the afternoon.  Mostly helping you measure, watching the marshmallows form as the gelatin and the
sugar syrup combine and then helping you cut and coat the final product. 
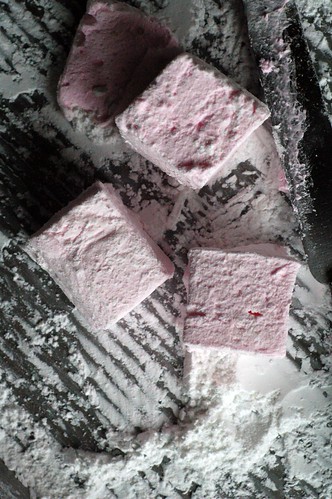
DSC_2462

Then you can all relax with a cup of hot cocoa topped with one of these beauties.


Basic Marshmallows with a few variations (adapted from Martha Stewart)
Makes approximately 36 marshmallows


Equipment:
stand mixer with a whisk attachment
spatula
9" x 9" square pan
or 13" x 9" pan
saran wrap
heavy bottomed 1 qt pan
wooden spoon


Base Ingredients
3 packages knox or equivalent in powdered gelatin
1/2 t flaked sea salt
1/2 cup cold water
2 cups sugar
2/3 cup corn syrup (I used karo)
1/4 cup water
1/2 cup potato flour
1/2 cup confectioner's sugar

Flavorings - use on of the following, or experiment


Vanilla

2 t vanilla extract

Mint

1/2 t peppermint extract
1 drop electric pink or green gel food coloring (optional)

Orange
1/4 t orange extract
1 drop electric orange gel food coloring (optional)

Lemon
1/4 t lemon extract
1 drop yellow gel food coloring (optional)

Framboise
1 T framboise liqueur

Chocolate-Cointreau

3 T cocoa
3 t cointreau

Directions:

Cut saran wrap to cover the bottom, sides and give you over hang on your pans, this may vary depending on your pan size.  Make sure all sides of the pan are covered with saran wrap. Spray generously with spray oil. I suggest doing this in the sink, the stuff goes everywhere and is slippery.

Pour gelatin into bowl of stand mixer, sprinkle 1/2 cup of water on gelatin, let sit for 10 minutes.
While gelatin is sitting, combine sugar, corn syrup and water into a heavy bottomed pan and stir over
medium heat until all ingredients dissolve. When dissolved, increase heat to medium high and let
mixture come to a vigorous boil for 2 minutes making sure to brush down sugar crystals from the sides
of the pan back into the mixture.
Remove from heat.

With whisk attachment running at medium speed, add salt to gelatin. Carefully pour hot syrup mixture
into bowl of stand mixer taking care to try and have the mixture run down the side of the bowl.  This
decreases the chance of it splattering hot syrup on you. Increase the speed to high and whisk for five
minutes, at this time, you can add the gel food coloring to your marshmallows.  Fear not. The color may
seem intense at first, but as the volume of marshmallows increases, the color will dissapate and
mellow.

At 10 minutes, add flavoring or in the case of the chocolate/cointreau add both cocoa and cointreau now.
At 14 minutes, turn off mixture and working quickly with a cooking oil coated spatula or hands (I use a spatula), remove the marshmallow mixure from the bowl and place into prepped pan, smooth out with spatula which you may need to coat again. It is not going to be completely smooth, they are homemade.  Spray the sides of the saran wrap overhang if you haven't already and cover the top of the marshmallows so they are completely covered.

Let them sit to cure for approximately 6 hours.  I like to do let them sit overnight.
When they are ready to cut, mix potato flour and confectioner's sugar together and place in a flat
rimmed cookie sheet or jelly roll pan. A pie plate will work too. Sprinkle a generous amount of the coating mixture onto your work area.Unwrap marshmallows and depending on the size of your pan, you will cut or use cookie cutters to cut out the marshmallows.  Coat knife in spray oil, cut marshmallows into approximately 1" squares and toss in coating mixture.  For marshmallows formed in a larger pan, you have the option to cut into squares (you will have many more) or use a sprayed cookie cutter and cut out shapes. Depending on your pan volume, you should yield 36-40 marshmallows.

Place coated marshmallows into a air tight container and use within a week. If you have friends like
mine, they should last approximately one day.

Package in acetate bags and tie top with ribbon. If you want to be really nice, add a small whisk and
a tin of sipping chocolate with your favorite recipe.


Thursday
Dec022010

nibbits

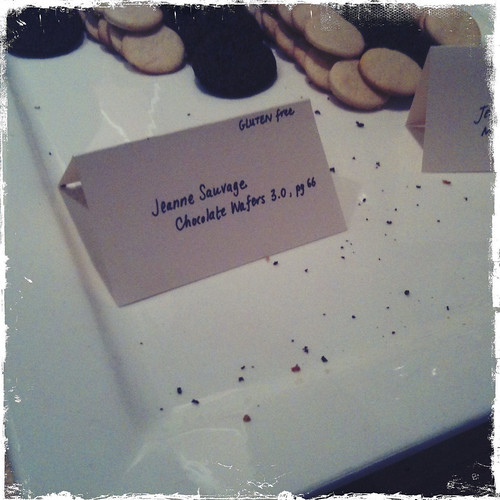
Alice Medrich in Seattle results in the best cookie exchange ever

Sunday
Nov072010

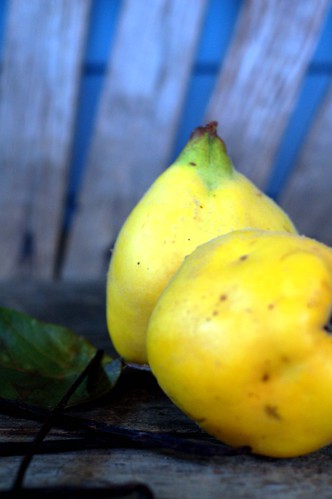
Vanilla Poached Quinces

DSC_2250

Let’s talk about quinces shall we?  They are horribly in fashion, showing up on farmer’s market tables and in the best of food blogs.  Before the quince became popular you might see a shriveled one or two at the grocery store near the plantains and star fruit, waiting for someone to take them home and love them.  Quinces are used in the United States for sweet dishes – jellies, conserves, and pastes.  In Persian cooking, they are served in savory stews and sometimes used as a confection.  No matter how you use them, they have to be cooked before eating, they are astringent and harsh.  When I cut into them, their texture reminds me of spongy wood.  With such descriptions, I can see why you might be turned off. Please don’t, with a little peeling, cutting, water, sugar and time on the stove,  the quince is transformed into a lovely rosy fruit that will make you forget all your misgivings about it.

So far this year, I have gone through two of my three basic quince season phases.  Elation and joy at the first quinces of the season leading to the making of quince jam and paste,  the offering of the quince to my mom for the savory stew and now, the realization that one quince goes a long way when you have been eating them for a while.

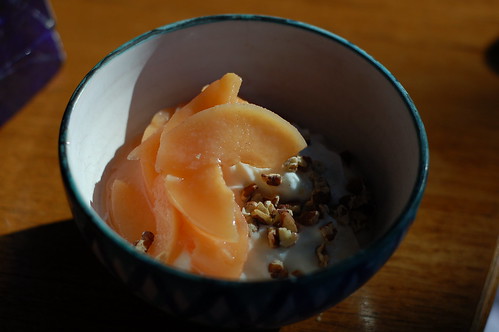
This year, instead of canning a lot of quince jam, I decided to just poach my first batch of quinces to have with my morning bowl of yoghurt.   Light sugar syrup and a few quinces poached with vanilla and a little lemon can make any morning seem a little brighter.  The recipe I typically use comes from Alice Waters’ Chez Panisse Fruit, a great compendium of seasonal fruit recipes that I suggest you pick up and peruse when you have the chance. 

Poached quince

Vanilla Poached Quince (adapted from Alice Waters, Chez Panisse Fruit, Harper Collins, 2002)

Makes 2 pts of poached quinces

Cooking time – ca. 1.5 hours, mostly unattended

Ingredients:

2 cups sugar

6 cups water

2 lbs quinces, ca. 4 large                                                                                                                              

½ vanilla bean

1 lemon  

Combine sugar and water in a 4 quart heavy pot.  Bring to a boil, stir to dissolve sugar, when dissolved, reduce heat to a simmer.  Peel, quarter and remove seeds from quinces, making sure to cut out any bruised or blemished areas.  At this point, you can reserve skin, seeds and leftover bits for other uses. * Slice quarters into ¼” slices.  Add quince slices to the syrup.  Slit vanilla bean in half lengthwise and scrape out seeds and add to syrup.  Wash lemon.  Slice lemon thinly, into approximately 1/8” slices and add to syrup mixture.  Make sure quince slices are submerged in simmering syrup.  Waters suggests cutting a parchment round the size of the pot diameter, layer over the fruit and syrup and weigh the parchment down with a plate, the alternative is to stand by stove and use a spoon to keep fruit submerged, you decide.

The quince slices should be tender in about 45 minutes.   Remove from heat.  If you like heavier syrup, remove slices from syrup, set aside.  Bring syrup mixture back to a boil and boil for another 10-15 minutes to thicken up the syrup.  Remove from heat and when back to room temperature add back the quince slices and the lemon.   The lemon should be transparent and candied at this point and very delicious with the quince.

The syrup and quinces can be stored in the fridge for approximately two weeks, if they last that long. I like to add them to my yoghurt and top the mixture with a teaspoon or two of roasted pecan bits.  I have also served them aside a ginger pound cake or topping a  French yogurt cake.

There you have it, elation, offerings and realization all in one bowl.

*  The skin and seeds of quinces are full of pectin, Christine Ferber, the famous French Jam maker uses quince juice extracted from these discarded bits as the foundation of some of her jellies.  For more information, refer to her instructions in her book, Mes Confitures: The Jams and Jellies of Christine Ferber.


Thursday
Nov042010

Bowls of full of memories - pear-ginger granola 

bowls of memories

My short term memory seems to be going, or I should say, there is so much going on it is easy to lose the little things in the all the stuff flying around the interwebs and our lives.  I can tell you my long term memory is great, just ask TH. I am famous for bringing up things in an argument that happened 15 years earlier. Its a gift I picked up from my father, just ask my mother.

I can also remember the provenance of each bowl in our kitchen.  Bowls are my weakness - cafe au lait bowls, hand thrown bowls, and old stoneware bowls, some found locally, some brought back from various trips around the world. In my opinion, most every meal, save a good steak can be eaten in a bowl. Desert island dwellers take heed, a spork and a bowl will save your life, although a coconut will do in a pinch.

Okay, enough with the bowl lust, let's talk about filling that bowl.

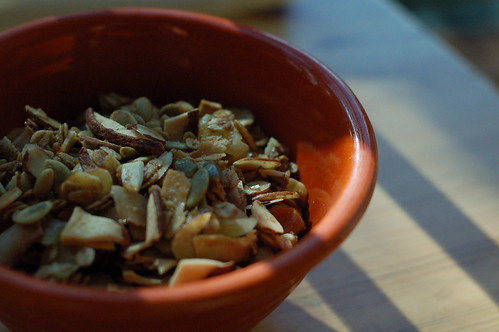
pear ginger granola


A few weeks ago, I had the great honor of meeting Melissa Clark at a book reading.  I have read many of her columns, but hadn't really familiarized myself with cookbooks. Her new cookbook, In the Kitchen with a Good Appetite: 150 Recipes and Stories about the Food You Love , has both great recipes, but even better stories behind each recipe.  One recipe that I have been making over and over again is her olive oil granola recipe. Like all good cooks and scientists, I first made the recipe by the book, and then started to modify it to my tastes.

Dang, this stuff is good and so far, everyone else who has sampled it has agreed.

The olive oil is an interesting twist on the neutral flavored oils used in most granola. I was my usual skeptical self.  I was worried about the taste overpowering the rest of the ingredients, but when paired with maple syrup, it works. I used a few different types of oils and settled on the Trader Joes Extra Virgin Olive Oil which has a nice flavor and a little lighter in color. The recipe also calls for 1 teaspoon of salt, do not skip this, you need it as a foil for the sugar and maple syrup. I used Secret Stash Salts' flavored salts, but if you can't get ahold of this wonder ingredient, please use a flaky sea salt. Unlike most granolas, this recipe does not make a chalky granola nor an oily one, it is perfect granola for munching out of hand or as a topping for greek yoghurt or for crisp. Melissa suggests serving it with fresh ricotta and fresh berries. I also tried a combination of fruits and nuts, using basically what I had lying around in the pantry. It is a great granola to use up odds and bobs in your pantry.


Pear-Ginger Granola (adapted from Melissa Clark's Olive Oil Granola Recipe from the book -  In the Kitchen with a Good Appetite: 150 Recipes and Stories about the food you love (Hyperion, 2010)

makes ca. 7.5 cups of granola, which depending on your family could last nearly one day or a week, give or take

Approximate time to make recipe from start to finish ca. 55 minutes, active time 15 minutes

3 cups thick cut oatmeal (I used Bob's Red Mill Gluten Free oats), but regular cut (not quick cook) oatmeal should be fine

1 cup unsweetened flaked coconut

1 cup pumpkin seeds, hulled

1 1/2 cups sliced almonds, raw

1/2 t ground cardamon

1/2 t ground cinnamon

1/2 t ground ginger

1 t flaked sea salt, I used Secret Stash Salt almond cardamon salt or vanilla salt, depending on what I had lying around

3/4 cup maple syrup, I used grade B, dark maple syrup

1/2 cup olive oil, extra virgin, but not too dark

1/3 cup light brown sugar, packed

1/2 cup uncrystallized candied ginger, cut into a small dice

3/4 cup dried pears, cut into a small dice

Directions:
Preheat oven to 250 Degrees F.

Take a large piece of parchment paper and cut it to fit an 11 x17 inch jelly roll pan  with about an inch of overhang on the sides.

In a large bowl, measure out oatmeal, coconut, pumpkin seeds, almonds, and brown sugar and mix well. In another bowl, mix together cardamon, cinnamon, ginger and salt until combined. Add spice mixture to large bowl of ingredients and mix to combine.  Mix together the maple syrup, oil and brown sugar and stir until dissolved. Add this to the oatmeal/spice bowl and using a large spoon or your hands and make sure the oatmeal,coconuts and seeds and nuts are coated with the syrup/oil mixture.

Place granola mixture onto jelly roll pan and place in oven to bake, stirring every ten minutes until the granola has taken on a lightly browned color and some of the syrup has cooked off, this should be approximately 35 minutes at 250 degree oven.

Remove from oven, and let cool in tray.

When cool, mix in chopped fruit.

Store in an air tight container.


Wednesday
Nov032010

Cauliflower - the brains of the vegetable world

cauli


Growing up, one of our dorky family traditions was to boil up a cauliflower on Saturday afternoon and eat it.  Yes, you read correctly, boil the hell out of a head of cauliflower and eat it with some salt, pepper and
lemon juice. If we were daring, we might venture to the sublimeness of boiled turnips. We lived
large back then - cauliflower, the Rockford Files and a nap. Saturdays were great nap days.

The smell of boiled cauliflower leads most to wrinkle their noses up and stare at the dog. It is not
a pleasant smell and it is a smell that lingers. Cauliflower is much maligned - its the last
vegetable left on the veggie tray, the vegetable that looks much like your brain on cauliflower,  the vegetable that turns grey with over cooking, over smothered with orange cheese sauce and the vegetable most likely to be fed to the aforementioned dog.

It is a vegetable that shines with tossed with olive oil and roasted. It becomes a whole other
creature -- sweetened, caramelized and savory at the same time. Tonight I was honored to be invited
to a small gathering to honor Amanda Hesser. The guests were asked to cook things out of her various
cookbooks and other New York Times cookbooks. I couldn't locate our NYT International Cookbook, so I
borrowed the The New York Times Country Weekend Cookbook from the library to see what I could find.

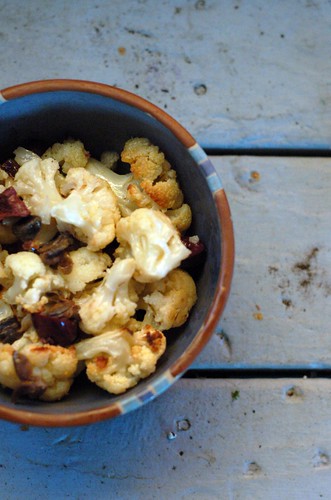
Hesser's take on Mario Batali's Roasted Cauliflower had me hooked. It hit the key points necessary
for potluck friendly food - easy to prepare, easy to double, best served at room temperature and
keeps for a day in the fridge and in fact tastes better with a little sitting around.  The recipe is really entitled - Roasted Cauliflower with lemon, olives and capers is a amazing mix of flavors. The sweetness and caramel flavors of the cauliflower, mixed in the tart lemon juice and lemon rind, a touch of garlic (just a touch, not overwrought) and the saltiness of
the capers and meatiness of the olives.

Its a keeper. 

The original recipe calls for a lot of olive oil. I was aghast at the amount. You need to use the oil
in three steps, cauliflower roasting, marinating and olive and caper desalting. You can limit the
amount of oil for the marinating, and discard the oil from the desalting. It all works out in the
end.

The recipe also calls for salted cured capers, these are an extravagance, but well worth it. They are
typically larger than the average brined caper and work beautifully paired with the olives.

Mario Batali's Roasted Cauliflower with lemon, capers and olives - From the New York Times Country Weekend Cookbook (2007).

Makes six generous side servings or 12 as nosheri
Time to make recipe ca. 1 hour, not all active time


Ingredients:

2 medium head of cauliflower cut into florets
salt and pepper
Approximately 2 cups good extra virgin olive oil to be divided and used for three different stages of the recipe
3 cloves garlic, peeled with green germ removed (halve the garlic)
2 T fresh thyme leaves, I used 1 T dried
Grated zest of 2 lemons, reserve lemon juice for end of recipe
3 T salt cured capers, rinsed and dried
1/3 cup kalamata olives, chopped

Heat oven to 375. Measure and cut a piece of parchment paper to fit in a jelly roll pan or large baking sheet.  Place washed cauliflower florets in bowl, add salt and pepper and toss to distribute evenly.  Pour 1/3 cup olive oil in bowl and and gently toss to coat the florets. Spread cauliflower on jelly roll pan. 

Roast in oven until cauliflower starts to brown and gets soft. You will want to check every 10
minutes and rotate the tray every ten minutes. The roasting should take approximately 30 minutes.
When completed, remove tray from oven and let cauliflower cool.

While the cauliflower is roasting, combine 1 cup of olive oil, garlic,  the lemon zest and thyme in a heavy,
but small pan. Place pan on burner to heat, but not boil You should have the oil bubbling gently. I
used a small copper sauce pan and had to keep my burner on a low heat. Check after about 20 minutes
to see if garlic is softened. When softened, remove from heat and let cool. When the oil has cooled
to room temperature, either use a blender or immersion blender to puree garlic into the oil.

In a separate pan, add the remaining oil, capers and olives together and warm for five minutes. Note:
My second making of this recipe - I rinsed the capers, but then just added them to a little oil to
help plump them up. I didn't heat them and they tasted just fine. I skipped adding the olives to the
oil as well. Once capers have plumped, drain oil.

Place cauliflower in a big bowl (you need to toss the mixture), add 1/3 cup of lemon/garlic oil and
toss to coat. You can add a little more of the oil mixtureif you want, but you don't want it dripping
with oil. Reserve the rest of the oil for another use. Add capers and chopped olives, season with
lemon juice and add salt and pepper if you think it might need a little more. The olives and capers
add a lot of salt, but not necessarily onto the cauliflower.

The dish is great at room temperature, but refrigerate if not using soon. Bring up to room temp before serving.